How to Fit Bar Mixer Shower Pipework
This post discusses how to 1st fix pipework for a bar mixer shower valve installation.
Introduction
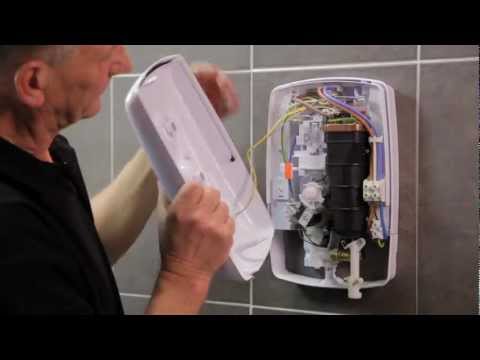
When installing a bar mixer shower valve such as the one shown, it is initially required to run hot and cold pipework to the valve.
Setting Up a Bar Mixer Shower Valve
Please see Choosing a shower for your restroom to learn more on shower types and their viability for your restroom.
This is done by recessing the pipes within the wall prior to tiling.
In this case research study I will be recessing the pipework into a bathroom wall that has currently been dot n dabbed with moisture resistant plasterboard.
Doing the plaster-boarding prior to the 1st fix pipework makes it much easier to get completely flat & level walls as you don't have the fiddly job of trying to fit the boards around/ over the pipework (among other things.).
Walls also require to be square in the corners to permit a great seal (along the edge of the bath in this instance.).
Please see Preparing walls for tiling-- reboarding for additional information associating with this subject.
Approach.
Utilizing Bath to Mark Overflow/Waste and Center of Bath Taps.
The bath is momentarily positioned in position, and the centre line (that runs through the overflow/ waste and the centre of the bath taps) is marked.
This will help us line the shower valve up with the taps for a more aesthetically pleasing finish.
The horizontal level of the bar mixer shower valve is then marked, which is normally around 130cm from the floor. If you are planning to fit a bar mixer shower with a fixed riser and shower head, you will require to guarantee that this height allows you to fit the shower in without it hitting the ceiling.
Correct Shower HeightIncorrect Shower Height.
Next the pipe centres are marked with vertical lines at 150mm centres i.e. 75mm far from the centre line in both directions. This is where the pipework will range from the valve, down the wall and link to the pipework under the bath.
Most bar mixer shower valves accept pipework at 150mm centres as this is considered standard-- if your particular design has a different pipeline centre value, then you require to reflect this at the marking out stage.
A location to be gone after out is then significant (into which the pipes can be recessed beneith the surface area of the plasterboard.).
The approximate height of the bath rim is also marked at this stage.
Correct Shower Height.
The areas to be gone after out are then chased after out using a specific saw, guaranteeing that they extend listed below the level of the bath rim, which is marked in pencil on the plasterboard.
Here we can see the pipework under the bath that will be extended approximately feed the shower valve.
The hot feed will be run up the left hand channel, and the cold feed will be added the right hand channel.
This is since the hot feed will enter the valve on the left (as we look at it) and the cold eat the right.
This is a market standard.
Since of this, the pipework under the bath remains in line with this configuration.
You can see that the bath drain & trap has actually likewise been fitted at this time. When the bath was in position, a cross was marked on the flooring through the waste hole in the bottom of the bath to mark the required location of the bath trap.
Copper Pipework Is Soldered And Then Placed Into The Channels.
2 pieces of 15mm copper pipework are then soldered together with a 90º elbow for each feed, which are then put into the channels as shown.
The horizontal pieces of copper (at the top) will eventually be cut down to go into the back of the bar mixer valve.
The pipes are held level and square to the wall at 150mm centres (centred on the initial centre line) by a home-made jig which is screwed to the wall temporarily. This is very important as connecting the shower valve depends on this phase of the https://plumberglasgow247.co.uk work being done accurately:.
Pipes Are Held Level And Square To The Wall.
It is important the the pipes are recessed far enough into the wall so that the 90º elbow fitting does not extend out beyond the completed tiled surface.
This will make sure that it does not interfere with the fitting of the bar mixer shower valve.
Incorrect Shower PipeworkCorrect Shower Pipework.
The pipes are then secured in location by utilizing either drywall adhesive, rapidset tile adhesive or a sand-cement mix.
If using a mix containing cement, please ensure the pipes are wrapped in duct tape to prevent the cement from attacking the copper which could cause pinholes and leaks developing with time.
The mix is pressed in and around the pipes and is utilized to support the cut edges of the plasterboard.
Mix Is Levelled Off Flush With Surface of Plasterboard.
This is then levelled off flush with the surface area of the plasterboard, making sure access to the bottom of the pipes is exposed so that they can be linked up later on.
Batons are screwed and glued to both walls surrounding the bath, and these will help to take the weight of the bath when it has plenty of water and/or residents. This will avoid it from dropping, which can lead to damaged silicon seals and water ingress problems.
Momentarily Position The Bath to Allow For The Pipework To Be Connected.
The bath is then momentarily placed in position to allow for the pipework to be connected.
The existing hot and cold pipework is linked to the appropriate pipework in the wall that will feed the shower valve.
Provisions are also made at this stage to link the bath taps-- via flexible push fit tap connectors in this circumstances.
As with the shower valve, hot is on the left and cold on the right (as you take a look at the tap) so this makes pipework much easier.
Jig Is Removed And Voids Are Filled With Adhesive.
When the adhesive holding the pipes has gone off and the pipes are securely kept in the proper position, the jig can be removed and any remaining spaces filled out with more adhesive.
As the pipework is now connected to the hot and cold supplied, stop ends can be seen in location at the ends of the pipes.
The bath is now be set up, and you can see the primary silicon seal around the edge of the bath in this picture.
Tanking And Tiling The Walls.
The walls are then tanked and tiled.
Installing a Bar Mixer Shower Valve.